Speeding up sound in Audacity
Welcome to the exciting world of audio manipulation! Audacity, a powerful audio editing software, allows you to explore various creative possibilities. One such feature is the ability to speed up sound, transforming sluggish audio into a dynamic masterpiece. In this guide, we will walk you through the steps to accelerate sound in Audacity, ensuring you have all the tools you need to conquer the realm of sonic velocity.
Importing audio
Launch Audacity and import the audio file you wish to speed up. You can either navigate to "File" and select "Import" or simply drag and drop the audio file directly into the Audacity interface.
Selecting audio section
Use your cursor to highlight the section of the audio you want to accelerate. If you want to speed up the entire track, skip this step. Otherwise, select the desired portion by clicking and dragging over it.
Accessing the Effect Menu
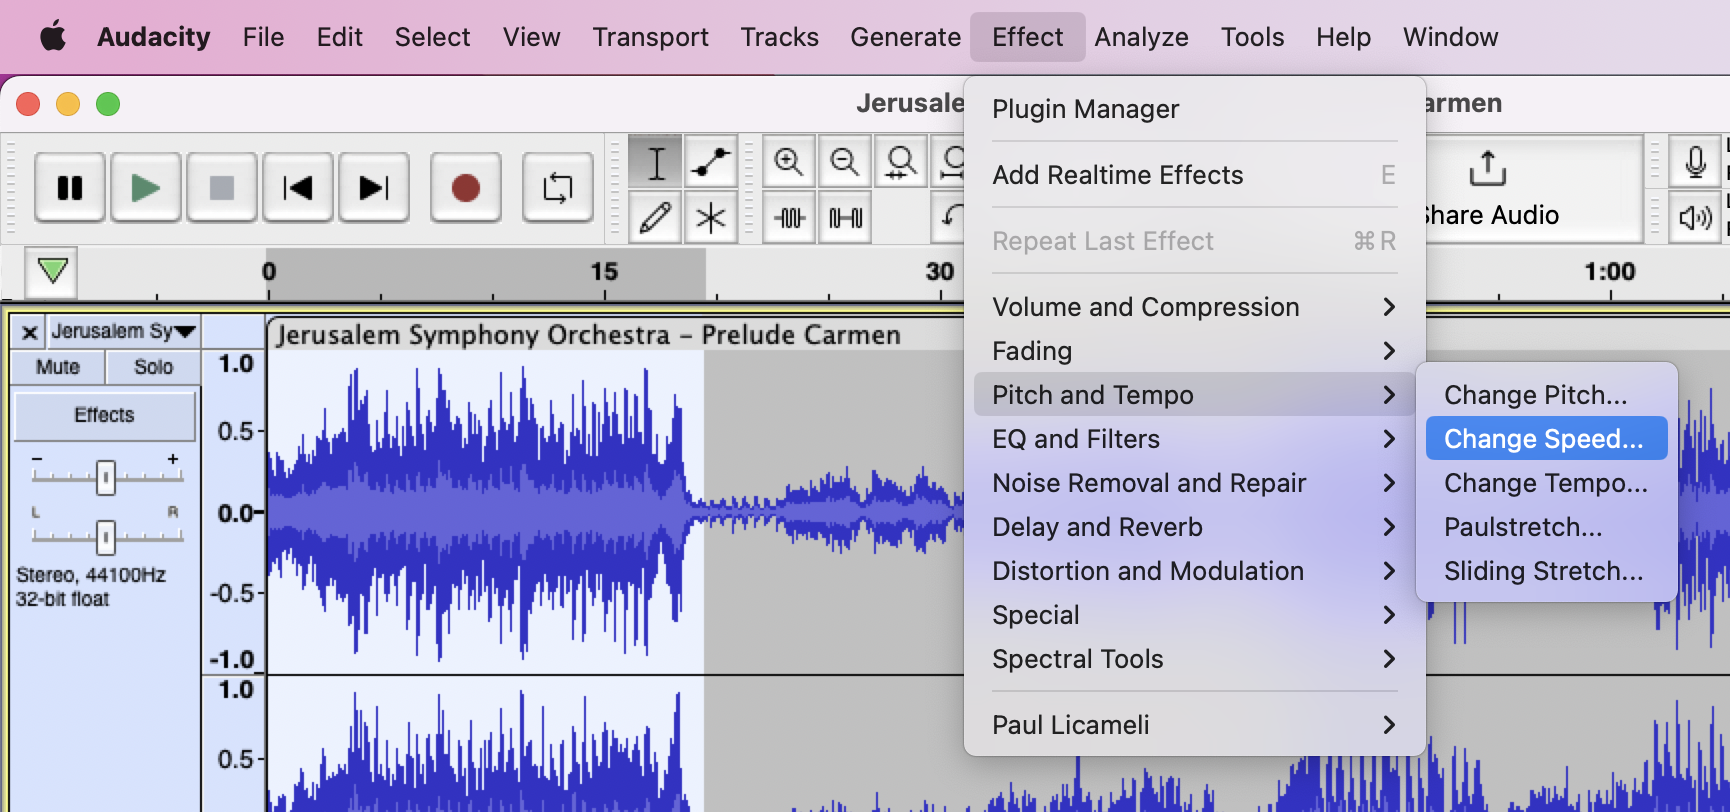
With the audio selected, navigate to the "Effect" menu located on the top toolbar. Click on it to reveal a drop-down menu containing various audio manipulation options.
Applying the Change Speed Effect
Within the "Effect" menu, locate and click on "Pitch and Tempo" — "Change Speed." A new dialog box will appear, providing you with settings to adjust the speed of the audio.
Adjusting the speed
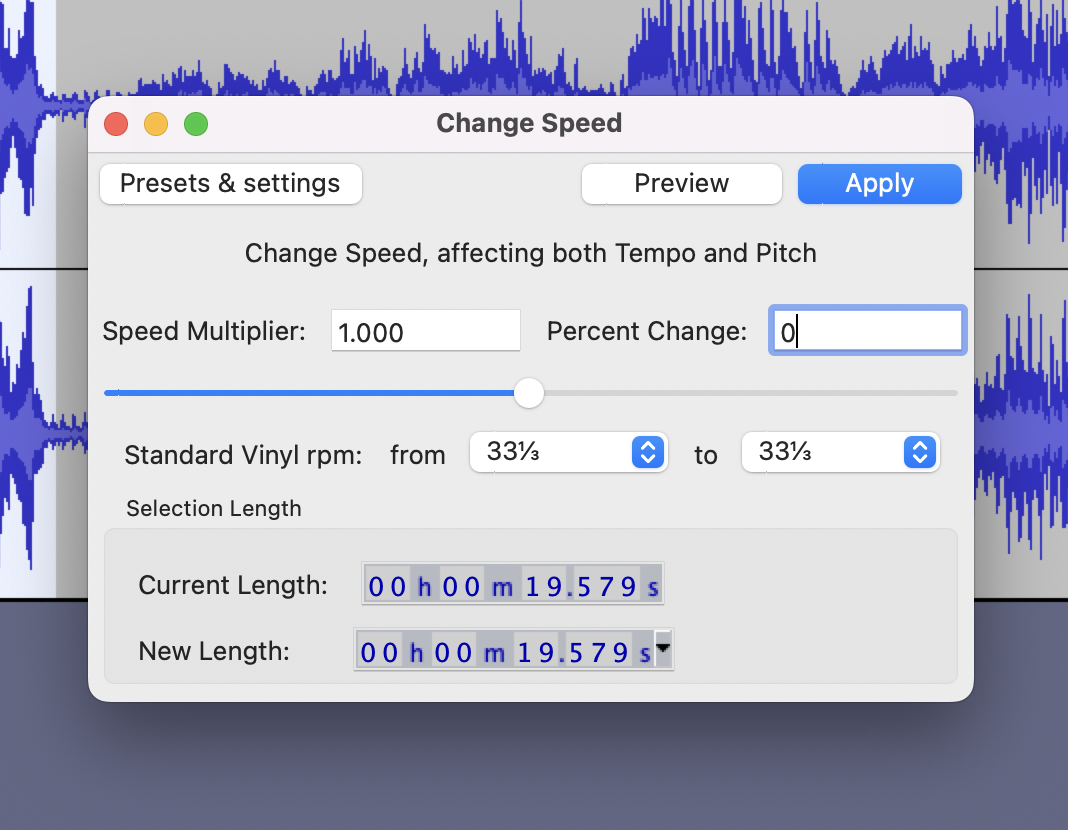
In the "Change Speed" dialog box, you will find a "Percent Change" parameter. Here, you can increase the value to speed up the audio. A positive percentage value above 0% will accelerate the audio, while a negative value will slow it down. Enter your desired percentage or use the slider to fine-tune the speed adjustment.
Previewing the changes
Click on the "Preview" button within the "Change Speed" dialog box to listen to the accelerated audio. This allows you to assess the impact of the speed change before finalizing it. Make any necessary adjustments until you achieve the desired effect.
Applying the changes
Once satisfied with the speed adjustment, click on the "Apply" button within the "Change Speed" dialog box. Audacity will now process the changes and apply the speed alteration to the selected audio.
Exporting the accelerated audio
To save your sped-up audio file, navigate to the "File" menu and select "Export". Choose a suitable file format (such as WAV, MP3, or FLAC) and select the destination folder where you want to save the file. Provide a name for the file and click on the "Save" button to export it.
Enjoy your sonic velocity
Congratulations! You have successfully accelerated sound in Audacity. Play your exported audio file in your favorite media player and relish in the newfound energy and excitement your accelerated audio brings.
By following such simple steps, you can unleash the power of sound editing in Audacity. Experiment with different adjustments to find the perfect balance for your audio project. Enjoy your audio editing journey!
Additionally, if you ever find the need to cut your audio files but you don't have Audacity installed, you can explore online services like audiocutter.online. Them offer convenient tools to trim, split, and manipulate audio files without the need for software installation.